Tag Archives: sewing

January 2024 wrap-up

Standard

Hello friends

It’s time for our January wrap-up and the sewing machine has been earning its keep!

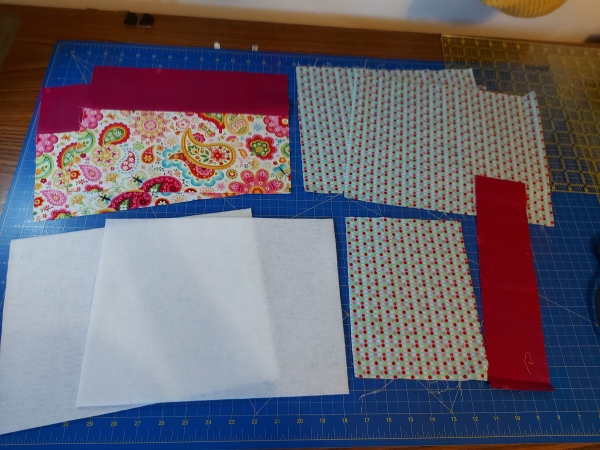
My Stitches and Slapdashery YouTube channel is an absolute joy, and since the high activity levels of Vlogtober and Vlogmas I have been keen to keep talking to the camera! My sewing output has been pretty high, as I decided to start building an  inventory for farmers and crafters market season. I haven’t yet applied for any but I’m hoping to get a table at a desirable location. 

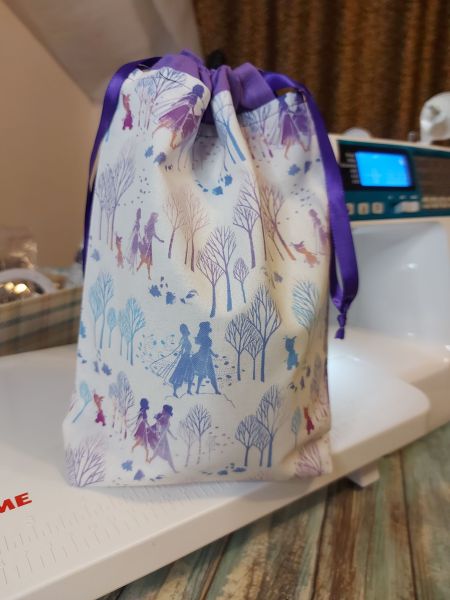
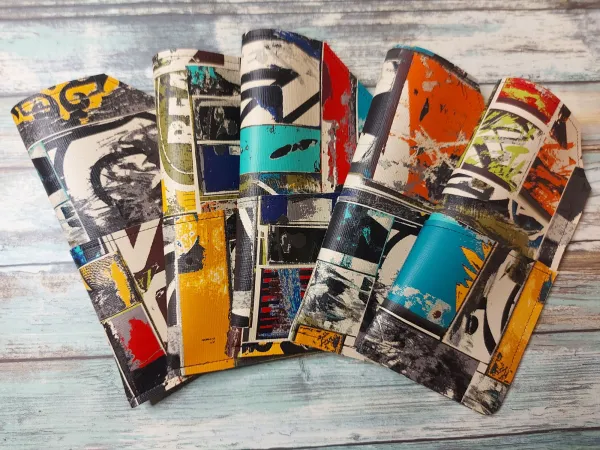
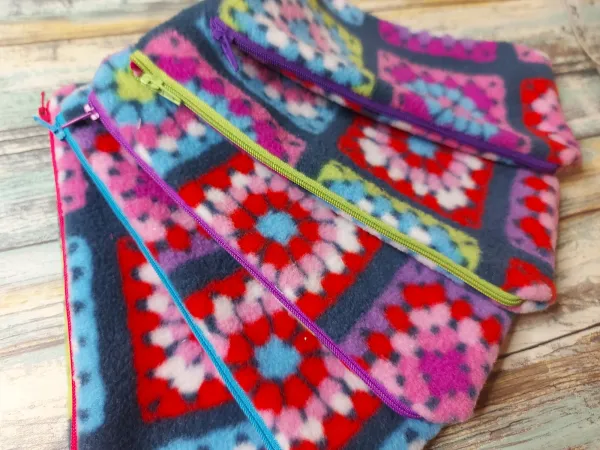
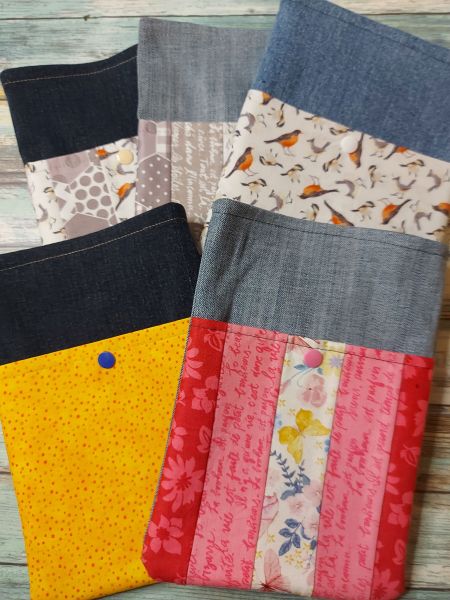
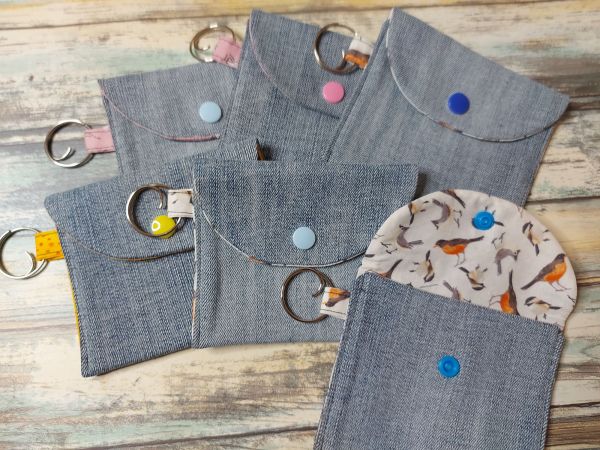
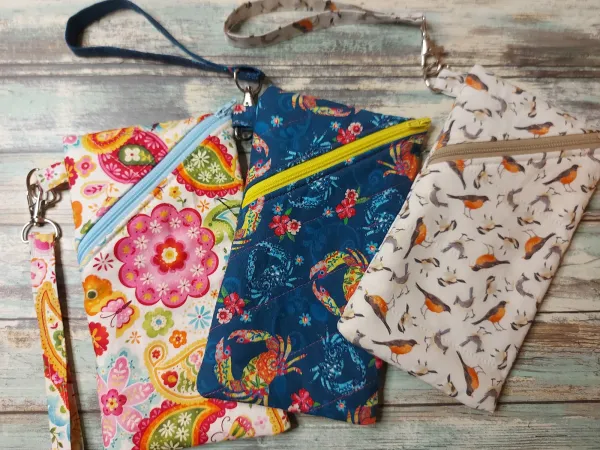
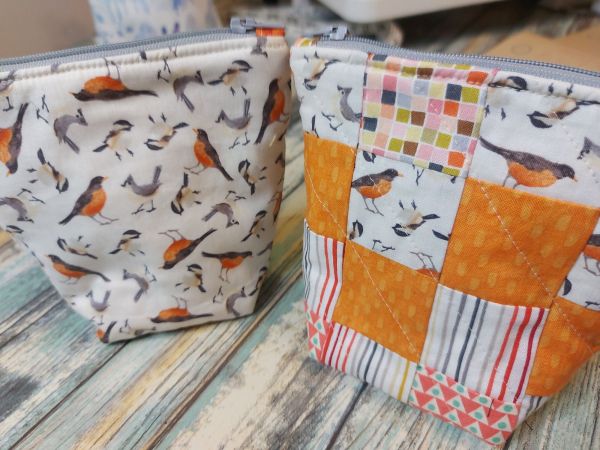
The things I’ve been making so far include zippered pouches, little snap pouches, book sleeves, phone cases, and soon drawstring bags and whatever else takes my fancy. I’m doing my best to use mostly stash fabric and accessories, and it does feel good to be using what I have and hoping that people will enjoy the products. 

I added a Ko-fi link to my vlog, where people can “buy  me a coffee” with a click through to my Ko-fi page. That felt kind of weird at first! If I decide to do online sales, I have the opportunity to add a shop aspect to Ko-fi, but I haven’t yet taken that plunge. The thought of overcoming hurdles like shipping has prevented me from starting so far. The cost of mailing things in Canada can make it twice as expensive to buy something online! 

Other projects I’ve been working on this month have included:

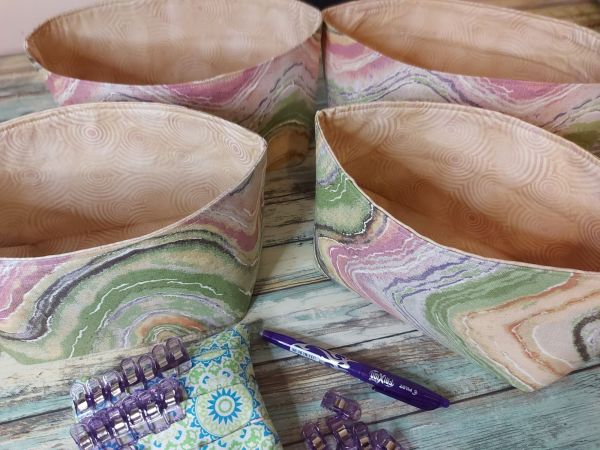
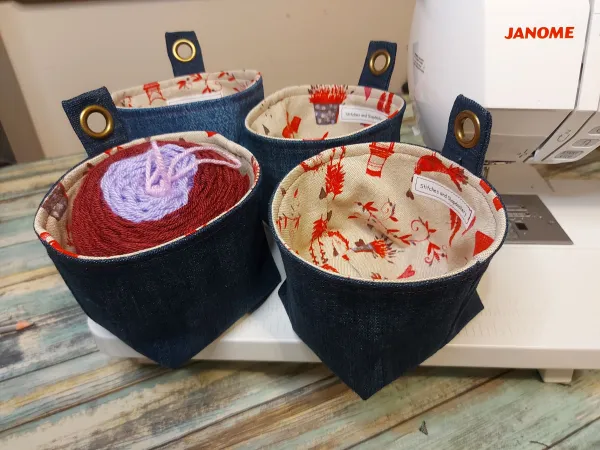
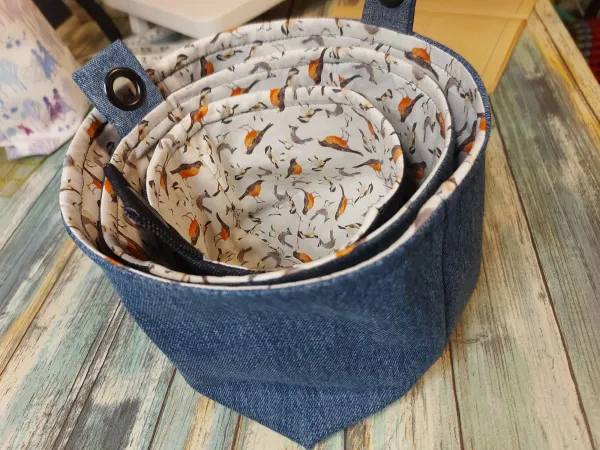
fabric baskets for displaying my wares at the market

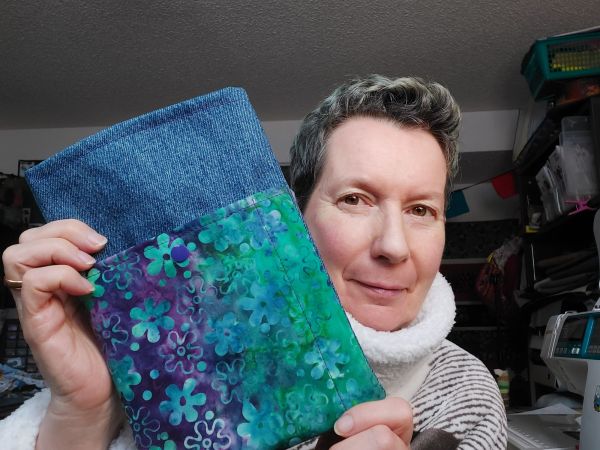
book sleeves using old jeans

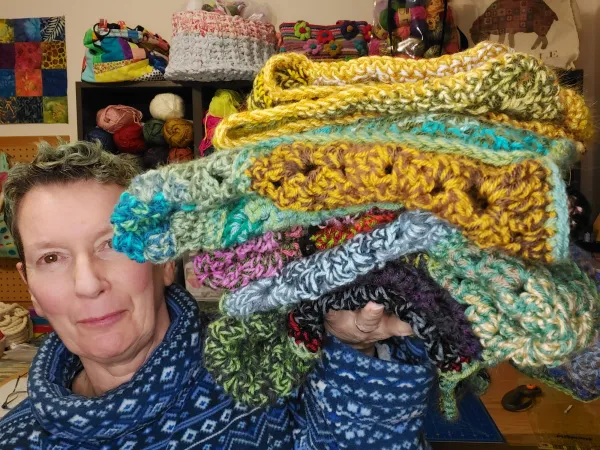
blankets for the cats at the SPCA (the granny squares were going to be for some wacky pants [trousers] for me, but they just weren’t working out)

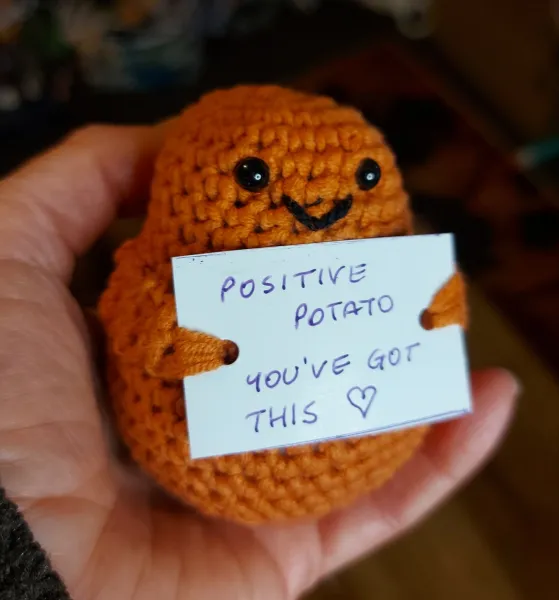
amigurumi from scraps of stash yarn (I need something to do with my hands when I’m waiting for my husband at the cancer centre)

a positive potato (yes, a crocheted potato with an encouraging message in its little hands for my husband)

a bandana style cowl (or buff) which knitted up in a couple of days (Nottawasaga Buff)

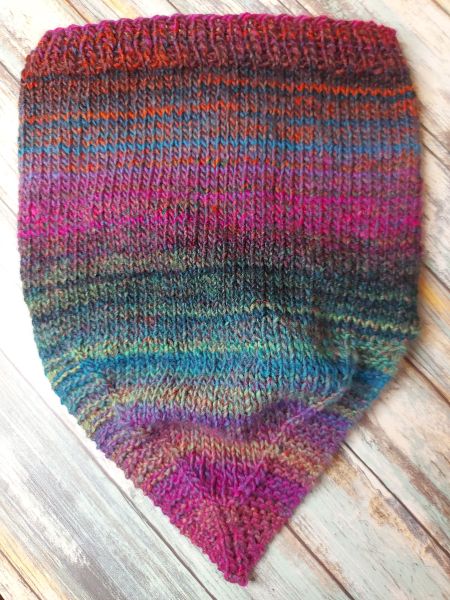
I’ll add a link to my Ravelry project page here to make it easy for you to take a look at the photos and notes, as it would take up too much space here. 

https://ravelry.com/projects/nicolaknits

And works in progress are:

the scarf for my husband which is a log of the progress of his cancer treatment – 6 colours, knitting a tube so the ends are hidden inside – green for radiation days, rust for chemo days, blue for rest days, etc. If you’d like to follow the progress of that, you can check out the Ravelry project page. 

the Festoon shawl, which is a crocheted shawl in sock yarn, with a small hook, and I have been letting it languish for far too long!

I’ve published seven vlog episodes in January, and two tutorial videos. The link to my channel is here.

https://YouTube.com/@stitchesandslapdashery

Yup, I really do love to talk! The tutorials are for fun zipper pouches out of chenille or fleece, and little denim baskets or yarn bowls that used upcycled denim and grommets, and are really simple. Be aware that these are not short pithy videos! I talk, I explain, I show as much of the process as possible, because sometimes people need to know WHY they are doing something a certain way, and what needle/interfacing/fabric is recommended for the project.

As for my husband’s health, well, he’s going through cancer treatment which is always horrible! There’s no way to sugar coat it, it really is a brutal way to try to get someone back to health. He’s having weekly chemo to zap any wandering cancer cells, but the main treatment is the radiation five times a week. His medical team consider his cancer to have been caught early, and don’t think it has had the chance to spread, so that’s good. But both chemo and radiation affect your entire body negatively, not just the cancer cells, and the list of all the things he may suffer from over the course of the treatment seems to get longer every week. We are two weeks in, out of seven. As time goes by, he is having more trouble swallowing. Eating a meal takes longer. He has been told to snack often to keep his digestive system busy and also to maintain his weight. He is using a mouthwash to try and keep sores at bay. He has Lidocaine to spritz in his throat when it gets too painful to eat (we’re not there yet). He has sennosides and Imodium, for the times when the drugs plug him up or give him diarrhea (hasn’t needed those yet either). Silver lining – he’s bald already! And shouldn’t lose his eyebrows!! Oh yeah, I forgot about the long term effects of head and neck radiation, which include loss of function in some salivary glands and tastebuds. Dry mouth is a thing. 

I am past the shock and disbelief and have  made it as far as acceptance. I also have faith that he will survive this. He has been told he is one of the healthiest cancer patients they have seen – no co-morbidities, healthy weight, non-smoker, non-drinker, healthy diet. He has barely ever needed to go to a doctor since I’ve known him. He is now on medical leave and can focus entirely on himself, without work stress, and I am doing what I can to support him. 

Well, that’s enough of that. Thanks for reading, if you made it this far! Please do go and check out my videos on YouTube. I do my best to make them fun and interesting. You might want to have some knitting or crochet on hand when you switch on, though, I do tend to ramble! 

I wish you all a peaceful and healthy February. 

PS: I think my two links above have been duplicated. When I pasted this into my post, I got a warning that it wouldn’t embed so I manually added the links. I’ll leave them as is. If one doesn’t work, the other should!

Sewing FOs

Standard

I only just got around to taking photos of these PJ pants, but they were finished before Christmas. I made them for Mr Fixit and didn’t want him to know I’d made them.

I used this pattern which I’ve had for a long time…

The blue tie dye ones are French Terry so he’s been wearing those to sleep in. The thin fleece ones with a Christmassy vibe are more for lounging in. I was surprised that the inside leg on the pattern piece was only 30 inches so extended them a couple of inches. I didn’t want them to be too short, as that was his main gripe about the shop-bought ones.

This isn’t a great shot but it was evening and I forgot to get a daytime picture before taking this coat to work. The colour is a deep magenta.

This fabric is called Nubby Boucle and is 100% polyester. It’s retailing for $50 a metre so the only way I was going to sew with it was to do a display project for work. I get to bring it home after a month.

Sewing with this fabric was mostly straightforward though I did break a needle when it had to get through four layers. And if I made it again I’d only interface the part of the front bands that’s hidden inside. I ended up having to trim back some unsightly white interfacing that was showing when the front of the coat flipped open.

I was also surprised by how narrow the sleeves were. My arms are pretty average and yet there wasn’t much room, especially if I wanted to wear a sweater underneath. Note to self: if I make this again, make the seam allowances smaller.

The instructions include three buttons and buttonholes. I thought I’d stick with just one button because I wanted it to drape nicely if I was moving around and sitting/standing. As the button I chose is huge I opted for a piece of cord to make a button loop. Much easier than sewing a buttonhole.

I fully intended to play in my sewing room again today but life got in the way. I stayed up late last night so slept in late this morning. Then I spent an hour taking down the Christmas decorations, tossing out the poor dried out tree, and vacuuming up ten tonnes of pine needles. And then I had to make a meal plan for the week and go out for groceries. And then it was time to make dinner. I had some help. We made sushi and miso soup and tested out a recipe from the VegNews magazine – Spiced Gingerbread Brioche Cinnamon Buns – which were as awesome as they sound and have about eleventy billion calories in them. Divine!

I think the rest of my evening is going to involve reading a Dean Koontz book from the library.

Bag Sewing Tutorial: the Caroline bag

Standard
Bag Sewing Tutorial: the Caroline bag

This bag, which I have named for my sister, is a cute sewing project which can be used for many purposes. Being a knitter/crocheter, of course I think of small yarny projects, but it could hold all sorts of things. The finished dimensions are 11″ wide by 7″ tall, and the base is about 2″ deep. It’s closed with two snaps (no zippers or Velcro to catch your yarn) and the inside pocket is also closed with a snap to keep small bits safe, like stitch markers.

I used my walking foot to sew this bag, which gives me a neat 3/8″ seam when I line it up along the edge of the fabric. This is the fourth version I’ve made. I’ll put a photo at the end of the other three. You can use a solid piece of fabric for your exterior, or piece together scraps to get the size required. Just allow for seams so that you can trim it to size. Don’t do what I did and mix up the width and height!

Cutting guide:

Exterior: two pieces of quilt cotton, 12″ wide by 9″ tall (or pieced work to equal the same size)

Interior: two pieces of quilt cotton, 12″ wide by 9.5″ tall (this is deliberate, you’ll see why later)

Thermolam (fusible fleece) or other interfacing of your choice, or batting: two pieces 12″ wide by 9″ tall, and two pieces about an inch square

Pocket: one piece of quilt cotton, 6.5″ wide by 8.5″ tall

Handle: one piece of quilt cotton, 12″ by 3″

3 KAM snaps

For this bag I decided to make the exterior with two fabrics, the paisley floral and the solid. In the photo above, I have already seamed them together. The next photo shows the Thermolam fused to the back and a line of topstitching across to secure the seam allowances. I used a stitch length of 2.2 for seaming and 3.0 for topstitching. If you use batting, you may want to add some quilting.

Pocket: fold the 6.5″ by 8.5″ square in half, right sides together (so that it’s now 6.5 by 4.25). Sew around the three open sides, leaving a couple of inches in the long side open for turning. Trim the corners. Turn right side out, using some sort of pokey tool to push the corners out. Press.

Insert a small square of Thermolam or interfacing inside the pocket, up near the fold and in the centre. Press again and topstitch across the folded edge, securing the interfacing.

Place pocket on one of the lining pieces, centred, about 2.5″ – 3″ from the top edge. Pin and sew around the sides and bottom. Fuse a small square of Thermolam to the back of the lining where the snap will go.

Install a snap near the top of the pocket.

Handle: take the 12″ by 3″ rectangle, fold in half lengthwise and press. Open out, fold raw edges to centre crease and press, refold and press again. Topstitch down both long edges.

Place one exterior piece and one lining piece right sides together, matching top edges. Repeat with the other two pieces. (If the front of your bag is different from the back, take care to attach the pocket/lining piece to the back exterior.) Sew. (Lining will extend half an inch beyond the bottom of the exterior. This is intentional.) Press seams, pressing lining and seam allowances in the same direction.

Fold handle in half and baste to front exterior, close to top, matching raw edges.

Place the two pieces right sides together, matching exterior to exterior and lining to lining. Pin or clip, being careful to line up centre seams. Sew around, starting at the lining bottom, and leave a few inches open for turning.

Box bottoms: Draw a 3/4″ square at all four corners, measuring from the seamline, not the edge of the fabric. Cut along the drawn lines. Squash the corners so that seamlines meet, pin or clip, and sew across each corner.

Press seams open (I used to skip this step but it’s especially important for the seam allowances to be flat for a neat finish around the top of the bag). Caution! Don’t iron your snap!

Turn right side out and press, avoiding snap. Allow lining to do what it wants to do naturally, which is extend about half an inch above the top of the bag. (A thinner interfacing may be more malleable, but the Thermolam wanted to do its thing and I liked how it looked. If you would prefer the lining not to show, cut it the same size as the exterior.) Topstitch “in the ditch” around the top of the bag.

Install snaps: mark centre top of bag, measure out 2.5″ from centre, half an inch down from seamline. Insert snap on front and back (I used my awl to just poke a hole straight through both layers at once), then repeat 2.5″ from centre on the other side.

Sew up gap in lining. And you’re done!

The black/scrappy bag was my first one. The scrap strip was built up on adding machine paper and had been sitting around my sewing room for months. Because I didn’t know at the time that the lining was going to want to stick out, it’s not quite deep enough. The toucan bag came second, and I figured out the better-fitting lining. And then I wanted to make another one. And another one. They are quite addictive! Hope you enjoy making one. Let me know if you do, and whether you made any modifications.

What a weekend!

Standard

Three days off in a row, and it feels like a holiday!

Sewed practically all day Friday (and took a couple of daylight photos of the bag)…

Saturday, did the grocery shopping and the library followed by a nice toasting in the sun. Pulled out some coconut oil that wasn’t being eaten and put some on my skin, and threw a blanket and a towel on the grass. Later we went to the gym. Enjoyed some reading time with one of my library books.

Sunday we were out early and had a walk along the lake…

Stopped for a tea at our favourite tea shop. Home for lunch then a little more sunshine time on the back deck.

There was still time for some more sewing and I made a drawstring project bag which required a lot less thought than Friday’s project. A palate cleanser, as it were, before I tackle another Yoan tutorial.

Then dinner and more reading.

And now my weekend is almost over. I hope you enjoyed your weekend and that all is well with you.

What the Fox?

Standard

IMG_20200128_155638

Now that I have stopped distracting myself with other things, I have made great progress on the knitting/crochet project bags for charity. I have decided to sell these for $24, with 75% of that going to CritterAid farm sanctuary in Summerland, BC. I have been posting pics of these to Facebook and one friend has already called Dibs on the What the Fox bag.

IMG_20200130_134140

The quilt panel has 12 animals on it so once all 12 bags are made I’ll make a bit more effort to sell them, probably posting to Facebook Marketplace. I’d rather sell locally rather than pay postage to send them elsewhere.

IMG_20200130_151103

The bags that I’ve made so far are similar – animal panel on the front, patterned quilt cotton on the back and for the casings, denim upcycled from old jeans for the base, cotton batting, and turquoise organic cotton for the lining. They measure about 10″ across and 10″ deep, and have a boxed bottom that adds a third dimension to fit more stuff! They also have a denim tab and keyring for attaching stitch markers or keys or whatever.

IMG_20200201_153432

Five made so far, seven to go. I really hope I can (a) maintain my enthusiasm and complete all twelve and (b) sell them all.

IMG_20200131_111901_609

What do you think? What’s your favourite?